Step 1 - Create a New VM (Virtual Machine)
Tutorial: How to Install Laravel 7 on VirtualBox VM Running Linux Mint 19
To install Laravel on our local machine, we need to first:
- Download and install Oracle VirtualBox
- Download a copy of Linux Mint 19
- Create a new virtual machine
Let’s get started.
Download and Install Oracle VirtualBox
Oracle VM VirtualBox is free software to run virtual machines on your computer (for personal use only).
If you will be using the virtual machine for any kind of commercial use, you can purchase a business product like Parallels.
Regardless of which option you choose, download the VM software you need an install it.
Download a Copy of Linux Mint (19)
Linux Mint is a lightweight version of Linux. I love it because it has a minimal, but highly usable, GUI (Graphical User Interface) and runs great on a virtual machine.
You can download a copy of Linux Mint from their website.
You can choose from 3 different desktops - Cinnamon, MATE, or Xfce - any of them will work. I like to keep my machine more lightweight, since I mostly use it for programming, so I like Xfce.
Set Up a New Virtual Machine
Once you’ve got VirtualBox installed and opened, you can create your virtual machine by following these steps:
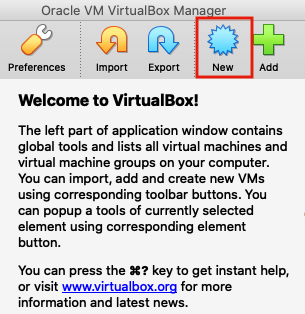
1. Create new VM
- Click on the New button
2. Name and operating system
- Name: Name your virtual machine (e.g. laravel-vm)
- Machine Folder: Select where you want to save the VM
- Type: Change to Linux
- Version: Change to either Ubuntu 64-bit or Other 64-bit
- Click Continue

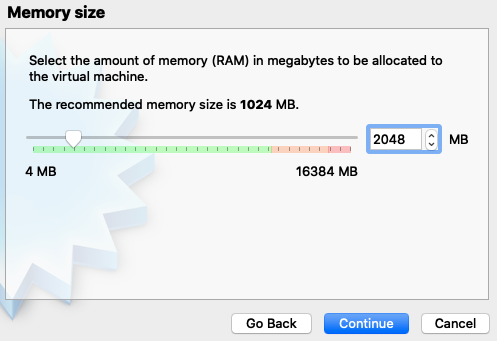
3. Memory size
- Select the amount of memory (RAM) you want
- Click Continue
I prefer at least 1028 MB, but often choose 2048 MB since I’ve had a lot of memory issues with my virtual machines
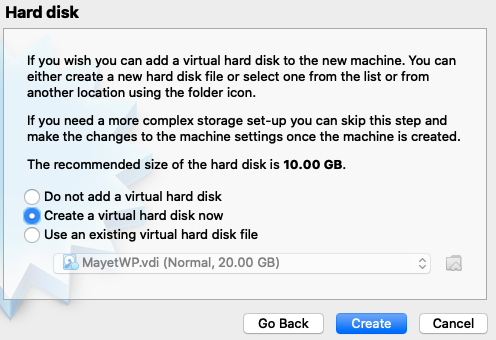
4. Hard disk
- Leave the default option to ‘Create a virtual hard disk now’
- Click Create
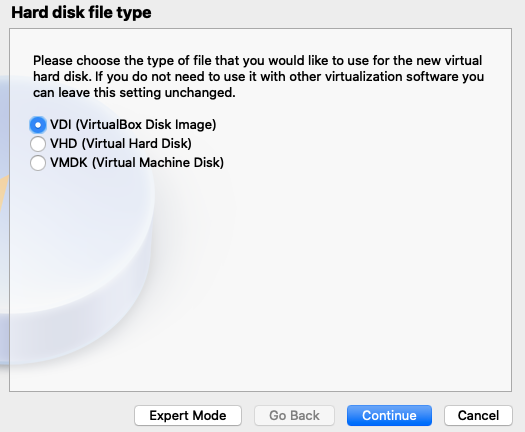
5. Hard disk file type
- Leave the default option for a ‘VDI (VirtualBox Disk Image)’
- Click Continue
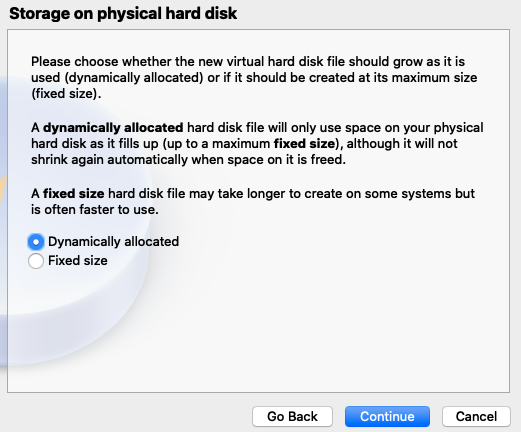
6. Storage on physical hard disk
- Select whether you want your hard drive to be dynamically allocated or fixed size
- Click Continue
I usually choose dynamically allocated
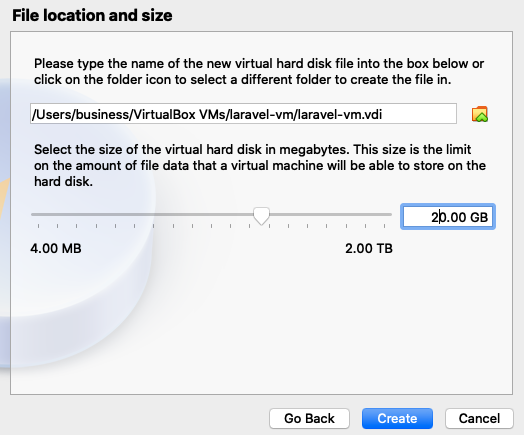
7. File location and size
- Select the maximum hard drive size
- Click Create
Mint 19.3 needs at least 10.7 GB just to install, but I like to give my virtual machines around 20 GB just in case
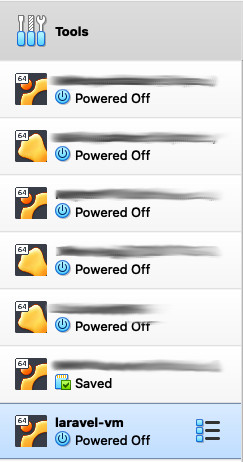
8. Select your new VM
- Once you’ve hit create, you should now see your new virtual machine in the Oracle VM VirtualBox Manager
9. Virtual Machine Settings
- With your new VM (virtual machine) selected, click Settings

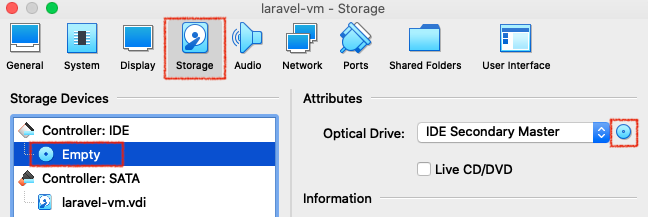
10. VM Settings: Storage
- Next, click Storage at the top
- Select the Empty option under ‘Controller: IDE’
- Click the round disk next to the ‘Optical Drive:’ drop-down list
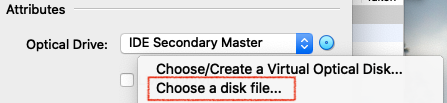
11. VM Settings: Storage -> Choose a disk file
-
From the menu, select Choose a disk file
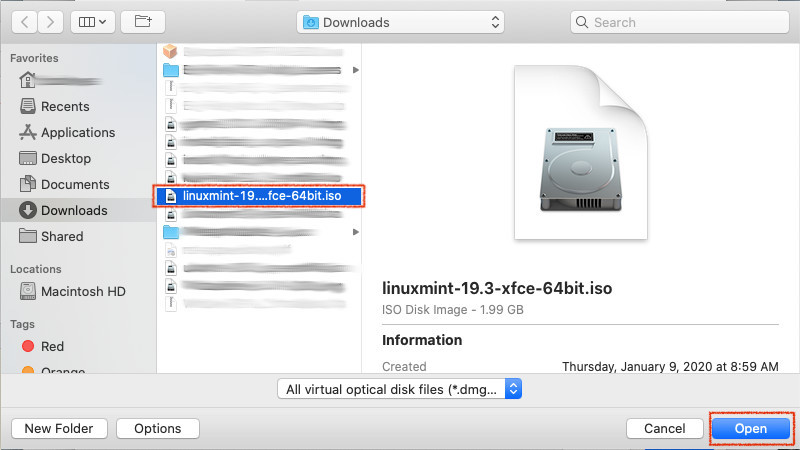
12. VM Settings: Storage -> Open Linux Mint OS
- Navigate to the directory where you saved the downloaded Linux Mint file
- Select it
- Click Open
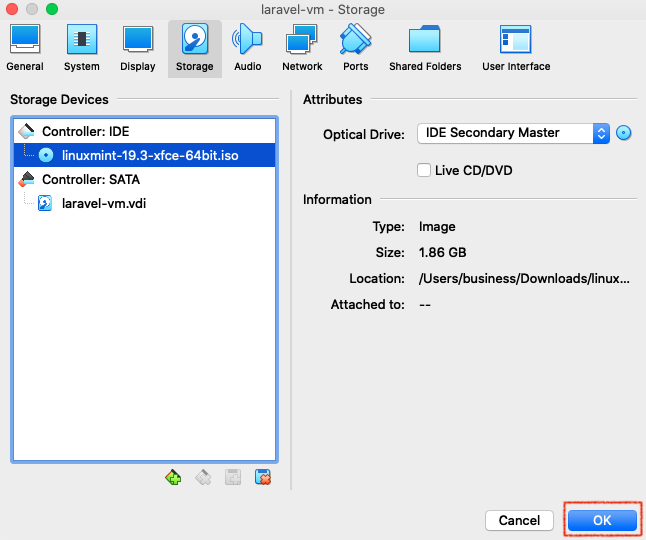
- Click OK to save your changes and close the Settings screen
Next Steps
Continue on to the next post - Start the virtual machine and install Linux Mint, then run updates